

The Anycubic Photon Mono X 3D printer is a small-size, low-cost SLA machine launched at the same time as the Photon Mono SE. With the Mono X 3D printer, Anycubic offers advanced users and beginners an 8.9-inch print surface and 4K resolution, with Wi-Fi connectivity to send prints over the network and monitor jobs remotely.
In this Anycubic Photon Mono X review, we will take a look at the features, how the model performs in practice, what it’s great for, and what downsides it has.
In terms of operation, the Anycubic Photon Mono X does not differ from its smaller siblings. First, we’ll see how it works by taking a look at what its printing technology printing quality, printing speed, compatible filaments, and applications are.
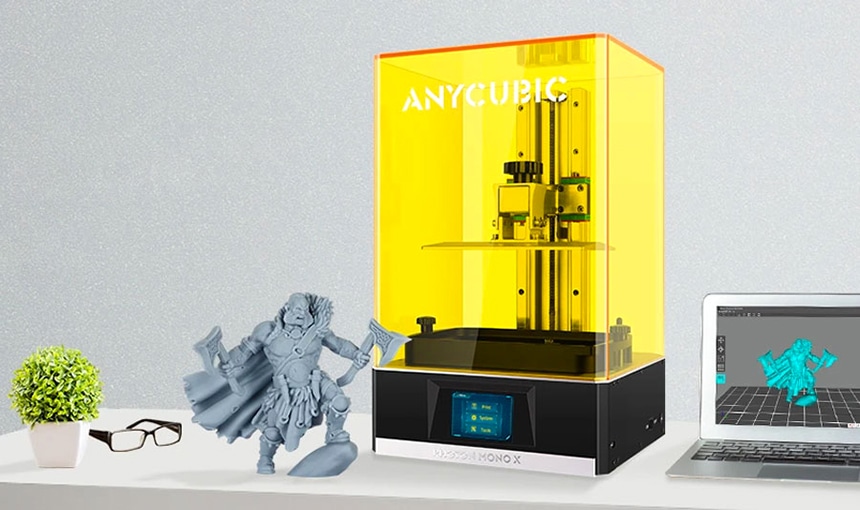
The Anycubic Photon Mono X is a resin printer with LCD-based stereolithography (SLA) and digital light processing (DLP) technology.
It works with the UV light source exposing liquid resin via the high-resolution display. It hardens it up in 0.01 – 0.1 mm layers on the desired places. The layers add very thin and can not be easily seen with the human eye.
For printing, the printing platform is lowered directly onto the film and the LCD exposes the areas where the resin should harden.
As soon as a layer is finished, the printing platform with the hardened resin rises and the next exposure starts. In this way, the print product is practically pulled upwards out of the resin.
The advantage of this technology is that the exposure of a layer always takes the same length – regardless of whether only a small area or the entire printing area is exposed.
As soon as the Photon Mono X has finished its program, the printed object can be removed and cleaned.
The device does not have a standby mode; although the fans will turn off (which incidentally are quite loud when in use).
Note: Anycubic recommends reducing the UV light intensity to 70 to 80 percent to increase the service life even further.
In terms of print quality, the strengths of the Photon Mono are particularly evident. On the first attempt at printing, a hollow, cubic-shaped grill could be printed out perfectly.
After that, good 3D print models were created from original STLs. The Windows and macOS compatible Anycubic Photon Workshop software can be used for this.
The workshop software ensures more convenient access and impresses us with its high level of user-friendliness.
Also, the program is sufficiently intuitive and is also suitable for users with basic 3D printing experience. The software does some tasks automatically that other printers have to do manually. The software allows the 3D printing angle as well as the shape and size of the supports to be selected.
In general, this is completely sufficient, but significantly fewer supports are required with the 3D resin printer than with filament systems.
However, some support issues may arise the first time you try to print. Nonetheless, the surface quality and resolution of the printed products were surprisingly great.
There’s not much to complain about when it comes to printing speed. You can make your first print in an hour.
The required printing time is calculated in advance and displayed as soon as the USB stick with the file is inserted. Incidentally, the USB stick is supplied by the manufacturer.
The Photon Mono impresses us with its very high level of detail, which means that the device can compete with some of the best photopolymerization 3D printers available on the market.
All in all, the Anycubic Photon Mono X is not only one of the largest DLP 3D printers on the market; it is also one of the best in terms of quality.
An exposure time of 1.5 seconds is sufficient for the standard resin. With other printers, this was 4 to 6 seconds. With ChiTuBox, the default exposure time is 6 seconds.
Anycubic specifies the printing speed for the Mono X as 60 mm/h. With a layer thickness of 0, 05 mm and a component height of 240 mm, the slicing program calculates a printing time of around 17.5 hours. In comparison: The Photon needs almost 13 hours with a height of only 110 mm.
The compatible filaments type for the Anycubic 3D machine is the 405nm UV Resin. In resin printers like this, a viscous resin is exposed to UV light, which then hardens in layers.
The technology has a higher resolution, enables a much more precise print image, and is more reliable to use.
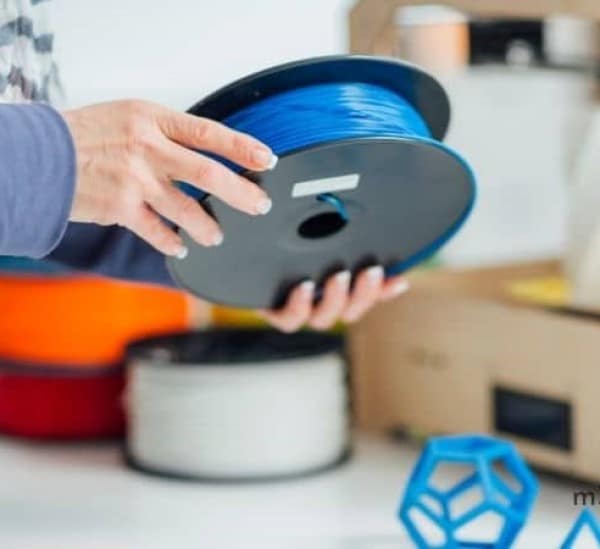
The cost of PLA, the easiest plastic to process, starts at around $10 to $20 per kilo of filament. Branded products or filaments made from a different plastic cost around two to three times as much.
It looks different with resin. Not every resin works with every printer, which is due to the different wavelengths of light used to cure the resin. This point is crucial when purchasing other brands of resin.
The Anycubic Photon Mono X works with a wavelength of 405 nm and therefore also works with the resin for Elegoo Mars (also 405 nm).
The prices for the resin filament start at $50 per liter. Brand manufacturers may charge up to four times as much. With technology becoming more widespread, a further drop in prices is to be expected. The costs have almost halved in the last few years.
The Anycubic Photon Mono X is most ideal for resin printing. The costs for the printer and resin materials have fallen sharply, which is why, asides from professional needs, they are now also being deployed for hobby use. Nevertheless, the printing costs are around three times as high as with the FDM process.
The Anycubic printer is ideal for beginners in SLA 3D printing who are initially looking for an inexpensive but reliable 3D printer. The manufacturer Anycubic seems to have created the ideal device with the Photon Mono.
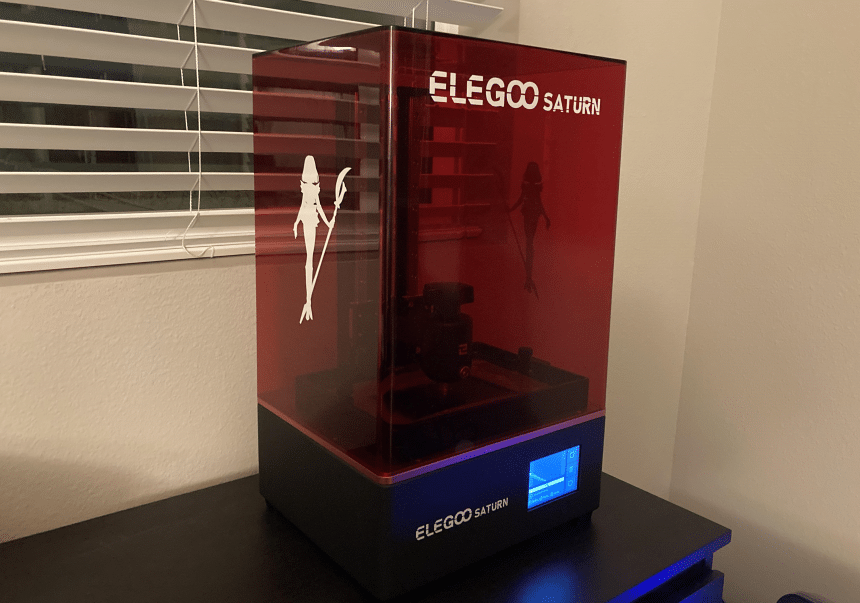
The Anycubic Mono X is the brand’s premium large format printer. It employs MSLA technology whose monochrome screen offers faster resin curing while reducing power consumption and being more durable. In return, this type of screen heats up more. It directly competes with the Phrozen Mighty 4K and the Elegoo Saturn. In this section, we will talk about the features of the Anycubic Photon Mono X 3D Printer.
The 3D printer is a large 3D resin printer with a large build size. It has a build size of 192mm (L) x 120mm (W) x 245mm (H). This makes it a big game-changer for three-dimensional resin printing.
Even the smallest details are easy to see after thorough cleaning; it’s no comparison to the FDM printers that work with ten times the layer thickness.
However, you have to note: to have a print image that is as clean as possible, the exposure time has to be right. Otherwise, details will be lost without a decent cleaning after printing.
At the top of the base is of course the heart of the 3D printer – an 8.9-inch 4K monochrome display that is illuminated with an LED matrix of 405nm UV LEDs.
These LEDs are actively cooled and, in combination with the monochrome panel, are so bright that the exposure time per shift is only between 1.5 and 2 seconds. This means that the Anycubic Photon Mono X achieves a printing speed of up to 60mm/s. The resin VAT with a transparent base is mounted above the display.
The printing table is made of brushed aluminum and is moved upwards on two guide rails on the Z-axis with a stepper motor. It is 202 x 128 millimeters in size, resulting in a printing space of192 x 120 x 245mm with a total size of the printer of 27 x 29 x 47.5cm and a total weight of 10.75kg.
To guarantee a high resolution despite its size, the Mono X works with a 4K monochrome display with a resolution of 3840 × 2400.
Compared to the RGB displays used in inexpensive resin printers, this has two decisive advantages. On the one hand, the displays have a four times longer service life of 2000 instead of 500 hours. As a result, more UV light comes through, which enormously shortens the exposure times.
Well, as far as the quality of the 3D printer is concerned, there is hardly anything negative to be found on the Anycubic Photon Mono X.
Anycubic specifies the accuracy as 0.01mm (Z-axis) or 0.015mm (X-/Y-axis). However, with gray resin from Anycubic, you will be able to measure an accuracy of 0.02mm.
With these dimensions, it can hardly be said whether the deviation from the manufacturer’s information is due to the printer or the tolerance of the caliper. But the Photon Mono X simply prints accurately.
The details are also outstanding with a layer thickness of 0.01 mm and there is no offset thanks to the stable guide rails.
The printer can be easily handled by beginner and advanced users. With the first print, the Anycubic Photon Mono X is first leveled and then filled with resin.
After putting on the protective cover, the corresponding print file on the USB stick can be selected and started via the menu on the display of the device or via the app. If necessary, the print’s core parameters can be adjusted (exposure time, offset, etc.).
The 3D printer does its job without any problems – even out-of-the-box without fine-tuning. The current status of the print can be tracked via the app and the display.
Furthermore, we’ll put its ease of use to the test by taking a look at its display, connectivity, compatible software, and ease of cleaning.
The 3D printer has a 3.5 inches color touchscreen, which is great. The screen recognizes touches reliably and precisely. The menu navigation is logical and clear.
The print data is even displayed as a graphic, which makes it easier to select the right model. The menu navigation is currently only available in English and Chinese.
With connectivity, you have options with a WLAN connection, USB connectivity, and app control.
Ultimately, the user only has to calibrate the printing platform and optionally set up the WLAN connection.
The second is a bit cumbersome using a text file on the USB stick. There, you have to enter the network name and password and saves them. This configuration file is then started in the Mono X like a print. A few seconds later, the connection is established, and print jobs can be started or monitored via the app.
To configure the Wi-Fi, go to “print”, then choose “wifi.txt”. This is an editable file in which you must enter the information of the ad hoc wireless network (SSID and key/password) broadcast by the printer and possibly other settings. Once again, the manufacturer provides full documentation.
Then, all you have to do is install the dedicated application (Photon Remote Control) on your phone to connect to the printer.
Note that the printer does not connect to the home network. It is a direct connection between the phone and the latter. It is therefore not possible to send a file to print directly from the slicer installed on a computer.
The print data is sent to the printer via a USB stick. The objects stored there can then also be started and monitored using the app.
iPhone users can get “Anycubic 3D” directly from the App Store. For everyone with Android devices, Anycubic (for whatever reason) only offers the download from the website.
After the installation of the software, the smartphone and the 3D printer must be connected to the same WLAN. This is uncomplicated for the smartphone and the printer only needs a configuration file to connect.
This must be prepared on the PC with the WLAN name and password and is then carried out on the printer. If the devices are connected, the printer can be entered into the app via its IP address. That sounds quite complicated at first, but with the appropriate instructions, it can be done in a few minutes.
The connection itself is more problematic – an mSLA-3D printer should never be used in closed rooms. You can make use of a second cell phone that you can set up as a hotspot. If you don’t have that, you have to come up with something else or do without the app.
But now to the actual functions of the app. There are three: First, the app shows the files that are stored on the USB stick that is connected to the 3D printer. These files can be selected and started.
During printing, the app shows the current status – how long has the print been running, how many layers have already been printed, how much resin is used, etc.
As a third function, the Anycubic Photon Mono X can also be controlled via the app. This includes pausing the print, but also regulating the exposure time, the “drip height” or the speed of the Z-axis.
All of this also works via the display on the 3D printer itself. To start you have to plug in the stick on the device anyway, fill in resin, observe the first layers and adjust if necessary. Apart from the status update, in my opinion, the app offers little added value and is more of a gimmick.
In principle, print files for the Anycubic 3D printer can be prepared with the common Chitubox Slicer. Alternatively, Anycubic also offers its own “workshop” slicer, which can be downloaded from the homepage. This is called the ANYCUBIC Photon workshop.
Anycubic’s software seems to be based on Chitubox (or to be inspired by it) because the programs look almost identical and have (almost) the same functions.
Print objects can be scaled, rotated, moved, or mirrored, and they can also be duplicated, aligned, and add a support structure.
However, the applications differ in some subtleties – for example, Chitubox automatically uses a “Z-Lift” for support, so the entire object is raised so that the actual pressure on the lower levels does not “merge” with the support structures.
This function does not exist with Anycubic; here, the object must be manually moved a few millimeters upwards in preparation. Also, the Anycubic Workshop lacks the button to duplicate objects, but the program offers the function of cutting objects into “groups” and printing them separately from one another.
There is no better or worse version – both programs have their advantages and disadvantages. We like Chitubox a little better, but it is best to try both programs and choose the one that suits you better.
In any case, all important parameters, such as exposure time, delay, etc. can be set via the slicer. After slicing, if the setting is correct, the slicer spits out a .pwmx file that can be saved on a USB stick and then executed on the 3D printer.
The surface of the printing table is made of brushed aluminum. This has excellent adhesive properties. But the print can still be removed with little effort. Well done, Anycubic!
Unfortunately, the good printing table would not spare you from cleaning duties. However, Anycubic has a solution for this in the form of the Wash & Cure Plus Station, which at least takes over the cleaning of the print object.
Alternatively, the whole thing can of course also be done manually with isopropanol. Either way, the cleaning of the printer and device is, as with all DLP 3D printers, quite cumbersome, but you will be rewarded with first-class results.
The printer is presented in a huge box without a logo or image. It is not that sexy. The machine is very well protected by several layers of plastic film, foams, among others in the carton.
The package contains all of the following:
There is no actual assembly needed since it is simply a question of installing the plate and the consumable. It only takes a few moments to put the Mono X in place.
The Anycubic Photon Mono X is a 3D printer that almost looks like an industrial device. This is thanks to its black housing in combination and the yellow UV cover.
On the front, the base houses a 3.5-inch touch display, which unfortunately is not 100% fixed in the housing. The firmware is designed in the typical Anycubic “spacey” blue design.
On the right side of the case, Anycubic has placed a USB port at the front. And further back there is a connection for the 120-watt power supply and the power switch. The back has fan outlets and the left side remains blank.
It is a machine that is easy to learn, both in terms of hardware and software. It allows large figures to be printed in one go and quickly while allowing a very high level of precision.
Another great thing is, while it may seem high, the price is fair, if not cheaper than its direct competitor, the Elegoo Saturn. The only real negative point is the fans which generate a significant noise nuisance. It would also have been nice if the unit was integrated into the chassis and the Wi-Fi more advanced to obtain an almost perfect machine.
The Anycubic Photon Mono X comes with one year warranty. However, the consumables only come with a three-month warranty.
The review made it clear that we are thrilled with the Anycubic Photon Mono X. Retaining for under $700 price, of course, this is a lot of money for a 3D printer. But given the results and ease of use, the price is still justified.
There is only room for improvement in the area of connectivity. If you are making the effort to install a WiFi module and program your software, why can’t I control the printer directly from the PC? However, this point does not change the great performance of the 3D printer.
Nonetheless, the Photon Mono X is by no means the best choice for everyone. If the print results have to be very precise and small, an Elegoo Mars 2 Pro, which is currently available for under $300, does the same.
If, on the other hand, you need large print, but do not attach great importance to accuracy in the micrometer range, you can get a gigantic print space and good quality with an FDM 3D printer such as the Sidewinder X1 for a little more than $400 – at least for an FDM device.
To justify the investment needed for the Anycubic printer, you should think carefully about what your 3D printer should do. If you want to print as accurately and as large as possible, the Photon Mono X is the device of your choice. Otherwise, you will get cheaper alternatives with many other models.
| PROS | CONS |
|
|
The Anycubic Photon Mono X 3D printer has won us over. With its large print area, very clean finishes, the speed and quality achieved thanks to the monochrome 4K screen, as we have seen in the Anycubic Photon Mono X review, it has it all.
Although the fan of the Mono X does not work silently, when you compare it to FDM printers, the printer is pleasantly quiet. We recommend it for those with large printing needs and who require high accuracy.
